
What Should You Modify First on a New Fourth-Gen Tacoma?
Verify fitment with the merchant before you buy.
Reviewed by DoesItFit Editorial · How we evaluate compatibility
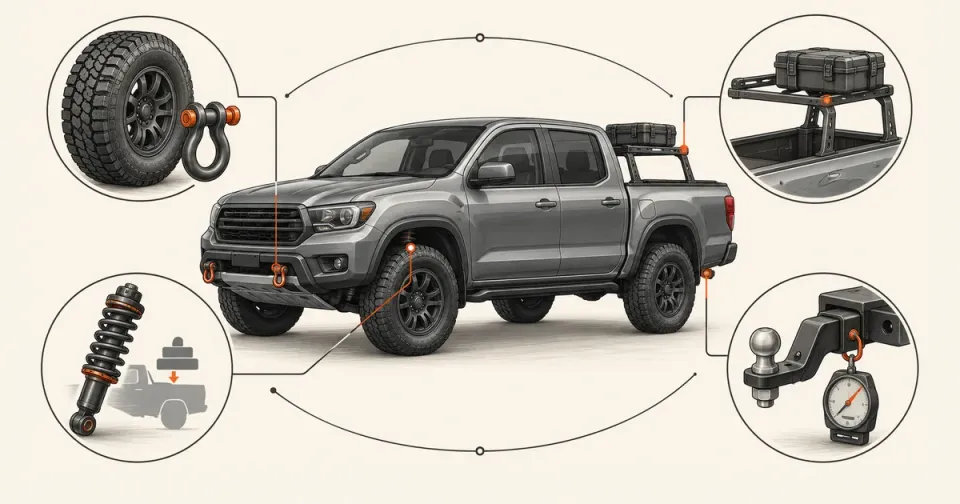
MODIFY THE FIRST MEASURED CONSTRAINT—NOT THE CATALOG
First record the truck's exact configuration, payload placard and stock behavior. Then drive it in the job you bought it for and fix the first measured constraint with the lowest-dependency change. For many daily drivers that may be a reversible protection or organization item—not a lift. Decide the final tire/wheel target and carried load before choosing suspension.
The safe build order
- Identify the exact truck.
- Establish a stock baseline.
- Define one real use constraint.
- Choose the least dependent fix.
- Set the finished tire, wheel and load target.
- Select suspension around that finished target.
- Recheck clearance, fasteners, alignment, lighting and driver-assistance systems.
This order is deliberately less exciting than buying a pile of parts. It is also how you avoid selecting springs before the bumper and winch, lifting for a tire that the wheel offset still makes rub, or adding a rack and rooftop tent before discovering the truck's payload budget is already tight.
Step 1: record what Toyota actually built
“Fourth-gen Tacoma” is not a complete configuration. Record the model year, cab, bed, grade, engine, gas or i-FORCE MAX powertrain, drivetrain, transmission, factory suspension and relevant factory equipment. Photograph the tire-and-loading placard and current tire label.
Use Toyota's VIN-specific record, then physically inspect the truck. The exact-configuration guide explains why the VIN is a strong starting point but the installed hardware still wins after prior repairs or modifications.
Also record a baseline: cold tire pressures, fender-to-hub measurements, alignment behavior, headlight aim, current payload math and any warning messages. If there is looseness, damage, abnormal wear or a pull, diagnose that as maintenance before calling it an upgrade.
Step 2: drive stock in the intended job
Do not let a generic “top five Tacoma mods” list define the problem. Use the truck first:
- Daily driving: Is the actual issue dirty carpet, difficult cab access, unsecured groceries or bed organization?
- Towing: Is it connector/brake-control readiness, tongue load, rear-axle load, visibility or stability?
- Trail driving: Is the limit tire traction, recovery readiness, rocker contact, underbody contact or approach angle?
- Camping: Is the constraint sleep packaging, covered storage, rack compatibility, payload or center-of-gravity height?
Write down the condition that produces the problem. “Front tire touches the rear liner at steering lock and compression” is useful. “Needs 35s and a three-inch lift” is already a proposed solution.
Step 3: choose the lowest-dependency fix
A reversible, narrowly scoped part is usually a safer first move than a system-changing part. Floor liners, a correctly fitted bed mat, cargo restraint, recovery equipment or an application-specific access step can solve real problems without forcing a new suspension or wheel decision.
But even simple parts have boundaries. A floor liner must match the cab/row/powertrain selector and use the factory retention system. A bed accessory must match bed length, rail equipment and cover/rack interfaces. “Bolt-on” does not mean “fits every fourth-gen.”
Heavy or geometry-changing changes deserve more sequencing because they affect the choices that follow.
If trail traction is first: tires before lift, but measure the whole package
For trail use, suitable tires can change capability more directly than height alone. That does not mean selecting a diameter in isolation. Tire model dimensions, wheel width and offset, alignment, suspension, mud-flap/liner shape and articulation all affect clearance.
ReadyLIFT's published fourth-generation examples illustrate the dependency: its no-trim examples are tied to exact kits, wheel sizes and offsets. Change the wheel offset and the result can change even within the same nominal tire family. Use the stock, leveled and lifted tire guide before ordering.
Also separate traction from protection. Recovery points and appropriate recovery gear address getting stuck. Skid plates and structural rock sliders address contact. A lift does not substitute for either.
If towing or camping is first: make the load budget before buying hardware
Start from the truck's occupant-and-cargo placard, not the highest payload advertised for some Tacoma configuration. Subtract occupants, normal cargo and trailer tongue load. Then budget the net installed weight of bumpers, winch, sliders, racks, tent, drawers, refrigerator, water and tools.
Toyota states that payload includes occupants, cargo and options and is limited by weight distribution. GVWR and front/rear GAWR are separate limits. Springs, shocks or airbags may change ride behavior, but they do not rewrite the certified limits on the truck.
Use the payload-after-modifications worksheet before committing to a heavy build. If towing is the job, confirm the exact receiver, wiring, brake-control requirements and manual guidance before suspension tuning.
Decide permanent front and rear loads before suspension
Spring rate and damping should match the truck you will operate, not the empty truck photographed on delivery day. A front bumper and winch can affect front ride height; a rack, tent and drawer system can change rear load continuously.
That is why the sensible order is:
- define the finished use and weight;
- select compatible tires/wheels and armor/cargo architecture;
- calculate the load;
- then choose a leveling kit, lift or coilover path.
If a suspension part is needed early, be honest about the future load with the manufacturer or installer. Otherwise you may buy springs twice or end with the wrong ride height after the heavy parts arrive.
Recheck the systems your modification disturbed
After a suspension or wheel/tire change, inspection is part of the modification—not optional cleanup. Current BILSTEIN fourth-generation Tacoma instructions call for wheel-alignment, headlight-aim and applicable ADAS checks. Toyota also identifies non-genuine suspension and non-specified tire sizes as conditions that can affect driver-support operation.
After any significant installation:
- cycle steering and suspension through the relevant clearance envelope;
- verify brake-line, sensor-wire and harness routing;
- torque and re-torque exactly as the instructions specify;
- align the truck and aim the headlights;
- follow the specified ADAS inspection/calibration process; and
- weigh the finished, normally loaded truck when payload or towing matters.
No warning light is not proof that every mechanical or calibration requirement passed.
Four practical first-mod routes
| Primary use | Sensible first move | What should wait |
|---|---|---|
| Daily driver | Solve observed protection, access or cargo-control issue with an exact-fit reversible part | Lift, oversized tires or heavy armor without a measured need |
| Weekend trail | Recovery readiness and terrain-appropriate tire plan; document contact/traction limits | Suspension until tire/wheel and armor/load targets are known |
| Towing | Exact hitch/electrical setup and real payload/axle-load worksheet | Rear springs chosen only from empty-truck stance |
| Overland/camping | Sleep/storage architecture plus full load budget | Rack, RTT, drawers and armor purchased independently |
Bottom line
The best first modification is the smallest exact-fit change that fixes the first problem you can reproduce. On a new fourth-generation Tacoma, configuration and baseline come first; tire/wheel and permanent-load targets come before suspension; and post-install verification completes the job. That sequence builds the truck once instead of paying to revise an unplanned stack of parts.
Sources & notes
- Toyota: 2026 Tacoma owner's manual, accessed 2026-10-15. Configuration, load-limit, towing, modification and driver-support context.
- Toyota: 2026 Tacoma brochure, accessed 2026-10-15. States that payload includes occupants, cargo and options and is distribution-dependent.
- BILSTEIN: B8 6112 #47-333246 and installation instructions, accessed 2026-10-15. Documents finished-configuration effects and post-install alignment, aim and applicable ADAS checks.
- ReadyLIFT: 1.5-inch leveling kit and 3-inch SST kit, accessed 2026-10-15. Exact kit/wheel/offset tire-clearance examples; not universal Toyota approval.
- Refresh plan: review Toyota documents annually and named product instructions quarterly. Hero is an original centered generic illustration, not exact-product or fitment evidence.