
How to Prevent and Repair Surface Rust on Tacoma Steel Armor
Verify fitment with the merchant before you buy.
Reviewed by DoesItFit Editorial · How we evaluate compatibility
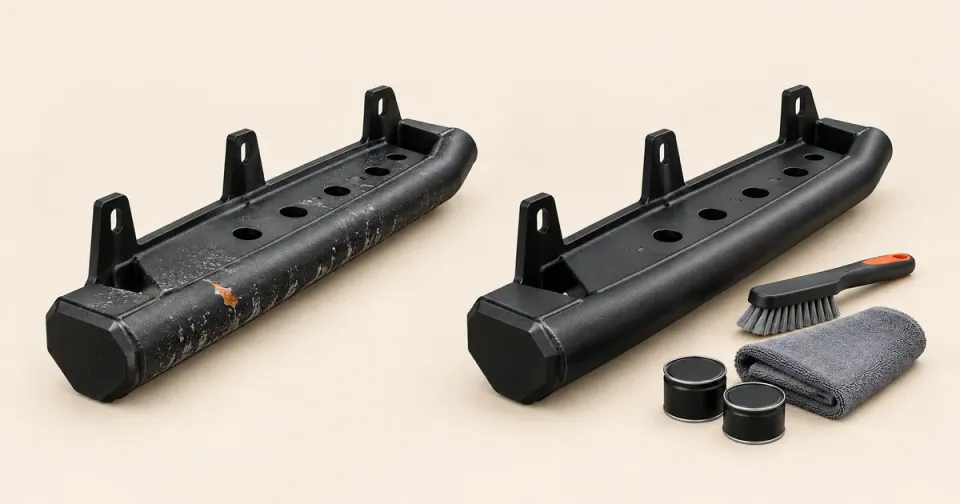
CLEAN EARLY, TOUCH UP CHIPS, AND ESCALATE STRUCTURAL DAMAGE
Prevent rust by washing salt and mud from powder-coated steel armor, rinsing and fully drying seams, chips and drain paths. For a small surface-rust chip, preserve sound coating, remove only loose rust and failed finish, then use a compatible primer and topcoat exactly as directed. Stop and get the armor inspected if you find deep pitting, perforation, cracked welds, deformation or loose mounts.
Steel armor needs a continuous protective finish
Powder coat protects steel only while the barrier remains intact. Rock strikes, road debris, mounting-tool slips and abrasion can expose metal at edges and welds. C4 Fabrication makes the principle explicit on a Tacoma steel bumper: a raw finish must be painted or powder coated before installation to prevent rust.
That does not mean every orange mark is structural failure. It means an exposed chip deserves early cleaning and a compatible repair before corrosion spreads under loose coating.
This guide covers early surface oxidation on steel bumpers, sliders, skid plates and racks. It does not cover Tacoma frame corrosion, cavity treatment or structural restoration.
Prevention is mostly contamination control and inspection
Salt and wet debris accelerate the problem because they sit in seams, ledges and damaged coating. The cited coating technical data begins with removing dirt, grease, oil, salt and chemical contaminants, rinsing with fresh water and letting the surface fully dry.
Use that sequence as the maintenance baseline:
- Rinse loose dirt and salt before scrubbing so grit is not dragged across the finish.
- Wash with a cleaner allowed by the armor or coating maker.
- Flush seams, plate overlaps, tube junctions and open drain paths.
- Dry the armor completely, including the underside and mounting areas you can safely reach.
- Inspect leading edges, weld zones, recovery-point surrounds, skid contact areas and recent rock strikes.
- Photograph a new defect before abrasive work if finish coverage or warranty may apply.
Avoid treating fresh oil or a generic undercoating as a universal cure. A coating can trap contamination, block drainage, alter a bolted joint or contaminate a grounding point if the exact product and location are not approved.
Classify the damage before touching it
| What you find | Likely path | Stop condition |
|---|---|---|
| Small chip with light orange film; solid metal; sound coating around it | Clean, prepare and touch up | Stop if corrosion extends under lifting finish |
| Loose/flaking coating around a larger patch | Wider preparation may be needed | Check warranty and coating-maker procedure before sanding |
| Deep pitting or visible metal loss | Professional inspection | Do not assume paint restores strength |
| Crack at a weld, bent bracket or elongated mount hole | Structural repair decision | Remove from demanding use until inspected |
| Perforation, spreading seam rust or loose mount | Repair or replacement assessment | Cosmetic touch-up is insufficient |
Surface color alone cannot certify remaining metal thickness or weld integrity. When armor is also a rated recovery point, winch mount, slider or load-carrying rack, the structural threshold matters even more.
A safe general workflow for a small surface-rust chip
The exact armor and coating instructions take precedence, but a compatible repair system generally follows this order.
1. Check the warranty and product instructions
Some manufacturers specify approved touch-up materials or exclude damage caused by abrasion, impact or chemicals. Record the defect and confirm the finish instructions before sanding away evidence.
2. Wash, rinse and fully dry
Remove salt, oil, mud and cleaner residue. Do not grind contamination into the metal. The repair area must be dry before coating.
3. Remove failed material—not sound coating unnecessarily
Remove loose rust, scale and deteriorated coating using the method allowed by the chosen coating system. Feather the transition only far enough to reach firmly bonded finish. The Rust-Oleum touch-up technical data also requires remaining coating to be sound and glossy surfaces to receive a suitable profile.
Use eye, respiratory and skin protection appropriate to the method and coating. Avoid nearby brake, exhaust, wiring and painted surfaces, and control dust and overspray.
4. Prime and topcoat as one compatible system
Do not assume primer alone is the final weather barrier. The cited touch-up primer calls for a topcoat after the primer is fully dry and notes that deep scratches or chips may need multiple coats for that exact product. Follow the selected system's film thickness, temperature, humidity, flash and recoat windows.
Match function before appearance. A perfect color match is less important than correct adhesion, coverage and curing—but incompatible materials can fail even if they look right on day one.
5. Reassemble and inspect correctly
Keep drain holes open. Do not coat fastener threads, clamped joint faces, sensor grounds or electrical grounds unless the manufacturer directs it. Reinstall hardware to the exact instructions and torque specification, then inspect the repair after its first wet, salty or trail exposure.
When removal and professional refinishing make more sense
A small accessible chip can be a touch-up job. Multiple under-film rust pockets, broad coating failure or corrosion hidden between plates may need the armor removed, stripped and refinished. Removal also creates a chance to inspect the back side, welds and mounting interfaces without pretending a front-side cosmetic repair reached the whole problem.
If armor geometry, mounts or welds are damaged, contact the manufacturer or a qualified fabricator. Sanding, primer and topcoat restore a barrier; they do not restore lost section thickness, straighten a load path or qualify a weld.
Compatibility snapshot
| Situation | Recommended decision | Boundary |
|---|---|---|
| New raw-steel armor | Coat before installation | Use the armor maker's approved prep and finish |
| Intact powder coat after normal road use | Wash, dry and inspect | Do not abrade intact finish without a reason |
| One shallow chip with early surface oxidation | Compatible local touch-up | Surrounding coating and metal must be sound |
| Rust beneath lifting powder coat | Expand inspection before repair | Visible chip may not show the full affected area |
| Cracked weld, bent mount or deep pitting | Structural inspection | Paint is not a structural repair |
| Armor used as a recovery or winch structure | Apply the strictest threshold | Confirm integrity before loaded use |
For buyers still choosing material rather than maintaining an installed part, the steel-versus-aluminum skid-plate guide separates coverage, mass and corrosion tradeoffs. For mounting and post-install checks, use the appropriate bumper, slider or skid installation guide rather than this coating workflow.
Bottom line
The best rust repair is a small one caught early. Wash salt and mud away, dry the armor, inspect coating damage and close exposed steel with a compatible primer-and-topcoat system. When corrosion includes metal loss or a damaged structural feature, stop treating it as a finish problem and have the armor inspected.
Sources & notes
- C4 Fabrication Tacoma Overland front bumper, accessed 2026-10-15. Manufacturer example documenting that raw steel requires paint or powder coat before installation to prevent rust.
- Rust-Oleum Stops Rust Touch Up Rusty Metal Primer technical data, accessed 2026-10-15. Current source for contaminant removal, drying, loose-rust/coating preparation, sound existing finish and primer/topcoat sequence for that system.
- Rust-Oleum Automotive Rusty Metal Primer, accessed 2026-10-15. Confirms primer as a base that requires a compatible protective topcoat.
- This is a general early-surface-rust workflow, not a substitute for the armor maker's finish instructions or a structural inspection. The hero is an original centered generic illustration, not coating, warranty or structural evidence.